
Mounting Dream TV Wall Mount, UL Listed Full Motion Mount Bracket for 42-84 Inch Flat Screen TVs, Swivel Articulating Dual Arms, Max VESA 600x400mm, 100 LBS Loading, Fits 16 Inches Wood Studs, MD2296
Original price was: $57.99.$49.99Current price is: $49.99.
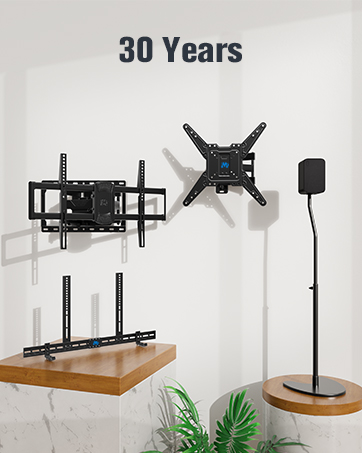
Related Products


From the brand


26-90″ FULL MOTION TV MOUNT


How to choose the right mount for 65 inch TV?
1.TV VESA Pattern
Firstly, get acknowledged of the available VESA Patterns of the TV Mount. Kindly noted that: VESA=HORIZONTALXVERTICAL.
2.TV Weight
Secondly, double check the weight of TV (without stand) through the TV manual, and make sure not to exceed the max loading weight of the TV wall mount
3.Possible Blocked Inputs
Then, check the inputs location and ensure TV mount won’t block ports.
4.Wood Stud Spacing
Finally, please check the wood stud location and spacing for centering the TV.
[Universal Design TV Mount] This wall mount which contains strong dual arms is suitable for TVs of weight 100 lbs and up to 42 Inches to 84 Inches. It is compatible with Max VESA 600 x 400mm/24 inches x 16 inches, 16 inches wood stud spacing. As a great option, you can also look for different Mounting Dream TV mounts.
[Enhance Your View] This full motion TV mount consists of 6 articulating arms that can extend up to 16.6 inches and retract up to 2.5 inches from the wall. Viewing is more pleasant with this wall-mounted TV bracket. It increases viewing flexibility by tilting the TV up 5° and down 15° to avoid glare, and by swiveling it 45° and adjusting the level 4°.
[Stability and Safety] The wall plate of the TV wall bracket has an eva pad for a cushioning effect. Robotic welding technology creates a firm and reliable TV mounting bracket unit that is safe for your TV and your family.
[Easy Installation] Swivel TV mount contains with clear instructions, paper template, level, and pre-labeled packages containing screws and spacers of various sizes. It comes with velcro strips as well to help in managing cords. The concrete anchors is available with Mounting Dream customer service (10x50mm anchor size). None of our TV mounts are just for dry wall.
US-based Customer Support: We are glad to answer your pre-purchase and installation questions about TV mounts. Mounting Dream TV wall mounts are NOT FOR DRYWALL INSTALLATION.
9 reviews for Mounting Dream TV Wall Mount, UL Listed Full Motion Mount Bracket for 42-84 Inch Flat Screen TVs, Swivel Articulating Dual Arms, Max VESA 600x400mm, 100 LBS Loading, Fits 16 Inches Wood Studs, MD2296
Add a review

Original price was: $57.99.$49.99Current price is: $49.99.
Stephanie –
Works great
This is a fantastic tv mount. It was easy to install, and I love how easy it is to adjust how your TV sits so you can view it. It feels super sturdy and secure and the size is perfect for our TV. I recommend this wall mount.
G. Swanson –
Mounting Installation Review and Suggestions – Nice Product
My daughter purchased this mount to hang a 65 Inch, 50 Pound, LG Television and of course, asked if I could mount it to the wall and then mount the television. The mount arrived well packed and contained instructions, a crazy amount of mounting screws, 4 lag bolts, small level, and a mounting template. The instructions were very generic but easy to follow. There is a plastic package with compartments for a lot of screws. First and most important, you must know where the studs in the wall are. I would not recommend mounting this to the wall in any way but with lag bolts into studs. Of course, the studs where this was mounted were wider than 16 inches on center so I had to install two 2×4 pieces of wood to the wall secured with 3 inch screws. (2×4 is 1 ½ inches thick, sheet rock is ½ inch thick for a total of 2 inches. 3” screws then go into the studs an inch).Installation Note: There are two metal brackets that attach vertically to the back of the TV that can be adjusted up and/or down. On this TV, they could not adjust down based on the shape of the bottom of the TV as it curved out. There is a movable clip on the bracket that goes towards the bottom of the TV. This clip attaches to the bottom bar that is put on the wall mount to give you an idea of the height of the TV once mounted to help with the location installing the bracket.After installing the 2×4’s, I centered the TV for where it should be mounted and then used the template to find the location of the lag bolts. One nice item on the template is that it has an adhesive strip on both sides so it will stay in place while finding the lag bolt holes. I pre-drilled the holes per the pattern provided to make it easier to install the lags. I also purchased shorter and slightly thicker lag bolts to mount the bracket to the 2×4’s with my ratchet set. Make sure the Template is level!After pre-drilling the holes, removed the mounting template (saved it) and installed the main mounting bracket using 4 Lags and Washers with my ratchet set. Note: Make sure the correct side is up. There was an arrow pointing up on my mount. Once secured, install the horizontal metal brackets or arms to the mount. They come in two pieces and slide through the mount in the specified area. Use a screw to secure them.Installation Note 2 – There are a lot of screws, washers, and spacers in compartments labelled with letters or numbers. The mount comes with a lot more screws and hardware then you will need. Just follow the instructions. For example, the instructions showed three sets of screws and various spacers to attach the vertical brackets to the TV. I only needed the last screws specified without any spacers. In other words, one of the sets indicated should work with your TV as each TV is different.Mount Test – Before Mounting the TV, after the mount is installed, pull the mounting arms forward and give it a pull to make sure it is secure. Again, I would not install this without using the Lags into Studs.Mounting the TV requires two people. Lift the TV and secure the upper support and then the lower support. While the 2nd person is holding the TV, flip the metal clip over the lower bar and secure to the TV. This will prevent the TV from coming off after installation.Once installed, the TV can be pulled forward away from the wall, swiveled left or right, and can be angled down. There are many adjustments if the TV is not level.Overall, I am very pleased with this purchase. The mount is very strong and well made. It was not hard to install although you needed the correct tools to do it. It is easy to adjust as well. It took me about an hour to install it and hang the TV. Now that I have done it once, I would say it could be installed in 30 minutes or less as long as you know where the studs are.Items Needed for Installation: Power Drill and Bits (pre-drill lag holes), Phillips Head Screwdriver (attach vertical brackets to TV by hand!), Ratchet Set (Installing Lags), Flashlight (final screws to secure the clips to the TV so you can see what you are doing), Level (my own although one was provided), Pencil, and Patience! You will need a 2nd person to hang and mount the TV. You will need a stud finder to find the studs if you do not have one. You can get a very cheap one at a hardware store or look for studs via nail or screw holes that are visible, or put a lot of small holes into the wall to find the studs!
Mark –
Works well
This is a nice product. Very easy to install although the instructions were not very good. This is the second one I have purchased for a second television. Sturdy. Currently holding a 65″ tv.
KM –
This is the one, really. : )
If you’ve been looking, I’ll tell you now, this is the one. We had the earlier version of this one a few years ago, and it was great, but I did have to resort to adding a few dimes to get it just perfect on leveling. No need for that here.PROS:- Super sturdy & strong- Extension bar allows offset installation, if studs aren’t centered.- Pivots sideways – both ways- Tilts up and down- Pulls way out from the wall when you need to access the rear, but pushes back to very close to the wall when you want it out of the way.Cons: A little scary to install, if you’ve never done this before.I’ve done a few of these over the years, & THIS is the one. I’d buy this one again without hesitation.FYI: These always look very scary to start, but once you realize that half the hardware is for other options, it’s a lot less scary (they give you all the hardware you need for installing in multiple ways, and with multiple TV setups. You will have a lot of hardware left over.).Basically, it has two brackets. One mounts to studs in the wall, & the second to the back of your TV – separately, so you can lift it up onto the wall bracket like hanging a picture. Simple as that. You just have to find your studs, drill the right size holes – in the * Right Location *, and mount it.You can do it alone, but to lift it up to the wall mount, you’ll want help from a friend. Pretty hard to do that part alone, just due to not seeing the back while you lift it solo. Even a weak friend or child can tell you where to move it, if you don’t have real help on the lifting part. TV’s are surprisingly light nowadays, so even a teenage girl could lift half.They even give you an extension bar, so if your studs don’t align with your placement goals, you can fudge it over quite a bit. Worked great for me.IMPORTANT TIP: Measure the area where you want the TV. We used Painter’s tape to outline the spot, with our table located beneath it, so we had a visual on how big everything was going to be. THEN be sure to MEASURE where the bracket needs to mount, to be sure your TV ends up where it needs to be.In our case, the studs & the TV mount were not dead center, so we mounted the TV bracket onto the back of the TV, then had to figure out where the wall mount needed to be, and lowered the wall bracket enough to account for the lower mounting our Sony TV used, vs another brand. With the tape outline, we easily found the 2 best studs for mounting, even though they were also not centered. We chose the two closest to the centerline. (We had 3 stud choices, if one didn’t work out. Huge TV)Be sure of placement, before you drill those big holes in your studs. You don’t want to do that twice.It’s easier than it sounds, so Good luck! : )
Moataz –
it is not same brand. poor quality. not same as picture.
Neil R. –
I purchased this to mount my 55″ 4K TV to the wall. The instructions were straightforward, and the lag bolts are very sturdy. The allen key holder on the frame is a nice touch in case you ever need to adjust it and can’t remember where you put the allen key. The mount came on time, and with all the bolts, spacers and adapters you need for most TVs, as well as a small level to help you level your TV after mounting. You MUST ensure you are mounting through to concrete or studs with the lag bolts not just to drywall, as one of the tests is to extend it fully out and pull down on it. I like the swivel and tilt adjustments, as they allow you to pull the TV out from the wall and swivel it. Once you set the tilt angle, I can’t see ever needing to adjust that.One piece of advice I would give is to figure out how high the TV needs to be and then figure out how it fits onto the mount. My TV ended up a tad higher than I would like, but I don’t want to dismount it, drill new holes and move it about 6 inches lower I centred the mount height based on the open area, but it does not mound exactly in the centre of the TV vertically. Overall I would recommend this unit.
Ahmed –
High quality and useful product
Christina Yadav –
Easy to install. Love that you can use the extension brackets to help centre your Tv even when your studs don’t always align. We’ve purchased two of these and both worked perfectly, are sturdy and were easy to understand instructions. Best mount we’ve purchased yet. Highly recommended!
Sahra –
I needed a mounting solution for my 55″ TV as the TV was in danger of being knocked over on a daily basis by my cats. This was incredibly easy to install by myself, the instructions were clear and even provided options of how to install depending on whether it’s studs or concrete.You will require some of your own tools, including a screwdriver, stud finger, and a socket wrench. They provide their own level, which was great to have as the only level I own is 28″ and would have been awkward to use for this smaller job.It’s been up on my wall for a few weeks now, adjusted a few times, and is very sturdy. I like that you can adjust the angle of the TV as well so if you hang it higher, you can tilt it down and visa versa. Makes it very versatile.